


Applying UV DTF stickers is a straightforward process that allows you to transfer high-quality, vibrant designs onto almost any hard surface without the need for a professional heat press or complex machinery. By following a few simple steps—cleaning the surface, positioning the film, applying firm pressure, and carefully peeling back the carrier sheet—you can achieve a durable, "printed-on" look that resists scratches and fading. This guide will walk you through the entire application process, from surface preparation to expert finishing techniques, ensuring your custom decals look professional and last for years to come.
What Are UV DTF Stickers and How Do They Work?
UV DTF (Ultraviolet Direct-to-Film) stickers represent a revolutionary leap in digital printing technology, combining the vibrant color output of UV-curable inks with the versatility of transfer films. Unlike traditional vinyl stickers that sit as a thick layer on top of a surface, UV DTF transfers consist of a specialized adhesive layer, high-definition UV ink, and a protective clear varnish that are all printed onto a carrier film. This combination creates a 3D-like, embossed effect that feels premium to the touch and offers exceptional visual depth. The "magic" of this technology lies in its ability to bond to non-porous surfaces through a cold transfer process, meaning no external heat source is required to cure the bond. When you apply pressure to the transfer film, the adhesive creates a permanent chemical-like grip on the substrate, while the UV-cured varnish ensures the design remains impervious to water, sunlight, and minor abrasions. This makes them an ideal solution for customizing complex items like mugs, water bottles, electronic devices, and industrial equipment where traditional printing methods might fail. Because the ink is cured instantly by UV light during the manufacturing process, the stickers are ready for immediate use and provide a level of detail and color density that far exceeds standard screen printing or solvent-based decals, making them the gold standard for modern DIY and commercial branding projects.
Tools and Materials Needed Before Application
To ensure a flawless application and professional-grade finish, having the right tools on hand is just as important as the quality of the UV DTF sticker itself. While the process is designed to be simple, using specific instruments can prevent common issues like air bubbles, misalignment, or premature lifting of the design edges.
-
High-quality UV DTF transfer film featuring your desired custom design.
-
Isopropyl alcohol (70% or higher) or a dedicated glass cleaner to remove oils and contaminants.
-
A lint-free microfiber cloth to wipe down surfaces without leaving fibers behind.
-
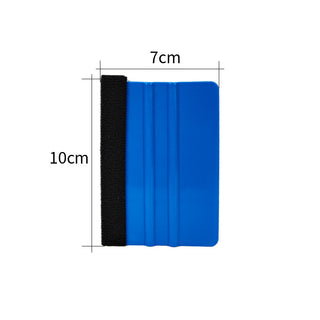
A felt-edged squeegee or a stiff plastic card to apply even, firm pressure across the design.
-
Masking tape or painter's tape to help with precise positioning and "hinge" method applications.
-
A pair of sharp scissors to trim excess film around the design for easier handling.
-
A steady hand and a well-lit workspace to ensure accurate placement on curved or small surfaces.
Having these items ready before you start will streamline the process and allow you to focus on the delicate task of peeling and sticking without distractions.
Surface Preparation for UV DTF Sticker Application
The longevity and aesthetic quality of a UV DTF sticker are almost entirely dependent on how well the surface is prepared before the film ever touches the object. Even the strongest adhesive will struggle to bond if there is a microscopic layer of dust, skin oils, or manufacturing residue sitting between the sticker and the substrate. Proper preparation ensures that the adhesive can achieve maximum surface contact, leading to a permanent bond that can withstand washing and daily handling.
Cleaning Different Surface Types
Different materials require slightly different approaches to cleaning to ensure the best possible adhesion for your UV DTF decals. For glass and ceramic items, using a 70% isopropyl alcohol solution is the gold standard, as it effectively breaks down grease and evaporates quickly without leaving any film or streaks behind. When working with metals like stainless steel or aluminum, ensure that any protective oils used during manufacturing are completely stripped away using a degreaser followed by an alcohol wipe. For plastics and acrylics, be cautious; while most are fine with alcohol, some cheaper plastics can craze or cloud when exposed to harsh solvents, so a mild soap and water wash followed by a thorough drying might be safer. Wood surfaces are the most challenging; they must be finished with a smooth varnish or lacquer, as UV DTF stickers will not adhere well to raw, porous, or unfinished wood. Regardless of the material, the goal is to reach a state where the surface is chemically clean and "squeaky" to the touch, providing an optimal foundation for the UV inks and adhesives to lock into place permanently.
Ensuring a Smooth and Dust-Free Area
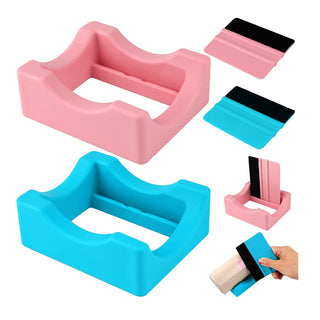
Once the chemical cleaning is complete, the physical environment must be managed to prevent airborne particles from ruining your work. Dust is the ultimate enemy of a smooth transfer; a single speck trapped under the clear varnish can create a visible bump or an air pocket that eventually leads to the sticker peeling. Work in a clean, indoor environment away from open windows, fans, or high-traffic areas where dust might be kicked up into the air. Before placing the sticker, use a fresh microfiber cloth or even a tack cloth to perform one final swipe across the application area to pick up any stray lint. It is also helpful to check the surface for any physical imperfections like scratches, burrs, or molded seams in plastic items; if a surface is uneven, the rigid nature of UV-cured ink may cause the sticker to bridge over the gap rather than settle into it. If you are applying the sticker to a cylindrical object like a bottle, consider using a foam cradle or a rolled-up towel to keep the item perfectly still, as any rolling during the application can cause the sticker to skew or wrinkle.
Step-by-Step Guide on How to Apply UV DTF Stickers
The actual application of a UV DTF sticker is a precise three-part process that requires patience and a steady hand to transform a film-based graphic into a permanent part of your product.
Positioning the Sticker Correctly
Correct positioning is the most critical step because once a UV DTF sticker makes contact with the surface, its high-tack adhesive makes it very difficult to move without damaging the design. Start by holding the transfer film over the object without removing the backing to visualize the final look. For flat surfaces, you can use a small piece of painter's tape at the top to create a "hinge," allowing you to flip the sticker up, remove the backing, and then lay it back down in the exact same spot. If you are working on a curved surface like a flask or a mug, identify the center point of the design and the center point of the object first. You should aim to apply the center of the sticker first and then work your way outward to the edges to prevent the graphic from becoming slanted. Taking an extra minute to measure with a ruler or mark the placement with a water-soluble pen can be the difference between a professional-looking product and a DIY project gone wrong. Always double-check the orientation to ensure the design isn't upside down or tilted before the adhesive touches the substrate.
Applying Pressure and Securing the Design
After the sticker is placed on the surface, the next phase involves activating the bond through mechanical pressure, a process often referred to as "squeegeeing." Start from the center of the design and push outward toward the edges using a felt-edged squeegee or the side of your thumb. This outward motion serves two purposes: it forces out any trapped air bubbles and ensures that every millimeter of the adhesive is pressed firmly against the substrate. You must be thorough, paying special attention to fine lines, small text, and the outer borders of the graphic, as these are the areas most prone to lifting if not secured properly. For rounded objects, use firm, rolling pressure with your fingers to ensure the sticker conforms to the curvature without creasing. It is recommended to go over the design several times with increasing pressure; the goal is to make the transfer film look like it has vanished, leaving only the ink visible. This step is where the permanent bond is forged, so do not rush it; the more effort you put into rubbing the design down, the more durable the final result will be against wear and tear.
Peeling the Transfer Film Properly
The final reveal is the most satisfying part of the process, but it requires the most care to avoid tearing the newly applied graphic. Begin by picking up one corner of the clear transfer film and peeling it back slowly at a very sharp angle—ideally 180 degrees, keeping the film flat against itself as you pull. Do not pull the film straight up away from the surface, as this creates tension that can lift the ink off the object. Watch the design closely as you peel; if you see any part of the sticker starting to lift with the film, stop immediately, lay the film back down, and rub that area firmly again with your squeegee or finger. Continue the slow, steady peel until the entire film is removed, leaving the vibrant, embossed UV ink behind. Once the film is off, you can use a soft cloth to gently press down on the edges of the design one last time to ensure everything is perfectly sealed. At this point, the adhesive is already very strong, but it will continue to cure and reach its maximum hardness over the next 24 hours, so avoid scratching or washing the item immediately after peeling.
Application Tips for Different Surfaces
UV DTF stickers are incredibly versatile, but their performance and application technique can vary slightly depending on the porosity and texture of the material you are decorating.
Applying UV DTF Stickers on Glass
Glass is one of the most popular surfaces for UV DTF stickers due to its smooth, non-porous nature, which allows for an incredibly strong bond. When working with glass, temperature can play a role; if the glass is too cold, the adhesive may be less tacky, so ensuring the item is at room temperature is beneficial. Because glass is transparent, any air bubbles trapped under the sticker will be highly visible from the other side, making the center-to-edge squeegee technique vital. For glassware that will be handled frequently, such as wine glasses or beer cans, try to place the sticker in an area where the user's hand won't constantly rub against the edges of the design. While UV DTF is dishwasher safe on many glass types, hand washing is always recommended to preserve the high-gloss varnish over the long term. If you encounter "ghosting" or residue on the glass after peeling, a quick wipe with a damp cloth will restore the crystal-clear finish around your design.
Applying UV DTF Stickers on Metal
Metal surfaces, especially powder-coated or brushed finishes, provide an excellent canvas for UV DTF decals, giving them an industrial, high-end look. Stainless steel tumblers are a primary use case, but you must ensure the metal isn't treated with a "non-stick" or silicone-based coating, as these are designed to repel adhesives. If applying to a brushed metal surface, try to rub the sticker in the direction of the metal grain to help the adhesive settle into the micro-grooves. Metal can also retain heat or cold more than other materials, so ensure the surface is neutral before application to prevent the adhesive from "pre-setting" before you have positioned it correctly. For raw metals that might oxidize, the UV DTF sticker actually acts as a protective barrier, preventing the metal underneath from tarnishing while the rest of the object ages. The durability on metal is exceptional, often making these stickers a preferred alternative to laser engraving for full-color branding on tools, electronics, and automotive trim.
Applying UV DTF Stickers on Plastic and Acrylic
Plastics and acrylics are generally very receptive to UV DTF stickers, but the variety of plastic types means you should always perform a quick test if possible. High-energy surfaces like acrylic and ABS bond almost instantly and very securely. However, low-energy plastics like polypropylene (often used in some reusable water bottles) can be more difficult; for these, extra pressure and a longer "set time" before peeling the film can help. When applying to acrylic sheets, which are often used for signage, ensure you have removed any protective plastic masking from the acrylic first. One major advantage of using UV DTF on plastic is the flexibility of the ink; it can handle the slight expansion and contraction of plastic items caused by temperature changes without cracking. Avoid using high-strength chemical cleaners on plastic before application, as they can soften the surface; a simple alcohol wipe is usually sufficient to create a perfect bonding environment for the sticker.
Applying UV DTF Stickers on Wood
Wood is a unique substrate for UV DTF because its natural porosity can be a challenge for standard adhesives. To successfully apply a UV DTF sticker to wood, the surface must be sealed with a smooth coating such as polyurethane, lacquer, or paint. Applying directly to raw, unfinished wood is not recommended because the adhesive will soak into the fibers rather than bonding to a surface, and the uneven grain can cause the ink to crack. Once the wood is sealed and sanded smooth, the application process is identical to other hard surfaces. The result is often stunning, as the embossed UV ink sits on top of the wood grain, creating a handcrafted, high-quality aesthetic often seen in boutique home decor. For wooden signs or furniture, this method is significantly faster and more detailed than traditional stenciling or hand-painting. Just ensure the sealant is fully cured before applying the sticker, as "outgassing" from fresh paint can cause bubbles to form under the decal over time.
Common Mistakes When Applying UV DTF Stickers
The most frequent error in UV DTF application is inadequate surface cleaning; even invisible oils from your fingertips can create "dead spots" where the adhesive fails to grab. Another common pitfall is rushing the peeling process; if the transfer film is pulled away too quickly or at a vertical angle, it can snap the delicate edges of the ink, leading to a jagged finish. Many users also fail to apply enough pressure, assuming that simply laying the sticker down is enough. Without the mechanical force of a squeegee, the adhesive doesn't fully "wet" the surface, which significantly reduces its lifespan. Additionally, applying stickers to surfaces that are too cold or too hot can interfere with the chemical properties of the adhesive. Finally, attempting to apply these stickers to highly textured or "soft" surfaces like fabric, silicone, or leather will almost always result in failure, as UV DTF is specifically engineered for hard, rigid substrates.
How to Ensure Long-Lasting Results
To maximize the life of your UV DTF stickers, allow the adhesive to "dwell" for at least 24 to 48 hours before subjecting the item to heavy use or moisture. While the bond is immediate, it strengthens significantly over the first day as it settles into the microscopic pores of the substrate. For items that require cleaning, such as drinkware, always opt for hand washing with a soft sponge and mild soap rather than using a dishwasher. High-temperature dishwasher cycles and harsh detergents can eventually degrade the edges of the varnish. If the sticker is applied to an outdoor item, try to position it away from direct, constant friction points. While UV DTF inks are highly resistant to fading from sunlight, keeping the item out of extreme, prolonged UV exposure will keep the colors looking "fresh-printed" for years. Proper storage of unused stickers is also key; keep them in a cool, dry place away from direct sunlight to ensure the adhesive remains tacky for future projects.
Removing or Replacing UV DTF Stickers Safely
While UV DTF stickers are designed to be permanent, there may come a time when you want to update a design or fix a mistake. Because the bond is so strong, removal requires a bit more effort than a standard paper sticker. The best method is to gently warm the sticker with a hair dryer (not a heat gun, which can damage the object) to soften the adhesive. Once warm, use a plastic scraper or your fingernail to lift an edge and slowly peel it away. If any adhesive residue remains, it can usually be removed with a specialized adhesive remover or isopropyl alcohol. For delicate surfaces, be patient and avoid using metal blades that could scratch the underlying material. If you are replacing a sticker, ensure that all traces of the previous adhesive and any cleaning chemicals are completely gone before applying the new design, following the full cleaning protocol once more to ensure the new application is just as successful as the first.
Frequently Asked Questions About UV DTF Sticker Application
UV DTF technology is relatively new, leading many users to have questions about its limitations and capabilities compared to traditional vinyl or sublimation.
Can UV DTF Stickers Be Repositioned?
No, UV DTF stickers generally cannot be repositioned once the adhesive has touched the surface. The adhesive used in UV DTF is a high-tack, permanent formula designed to grab hold immediately upon contact. If you attempt to lift the sticker after it has been pressed down, you will likely tear the thin ink layer or stretch the design, rendering it unusable. This is why the "positioning" step is so crucial; you must be certain of your placement before allowing the film to meet the substrate. If you make a minor mistake during the initial laydown and haven't pressed it yet, you might be able to lift it very gently, but this carries a high risk of damaging the adhesive quality.
Are UV DTF Stickers Waterproof and Scratch Resistant?
Yes, one of the primary advantages of UV DTF is its extreme durability. The UV-cured ink is naturally waterproof, and the clear varnish layer added during the printing process provides a hard, protective shell that resists scratches and daily wear. These stickers can be submerged in water, rained on, and handled frequently without the colors running or the design flaking off. While they are scratch-resistant, they are not scratch-proof; sharp metal objects or heavy abrasives can still damage the finish, just as they would with automotive paint. For everyday items like phones and water bottles, they offer more than enough protection to stay looking new for a very long time.
Do UV DTF Stickers Require Heat Press?
One of the best features of UV DTF stickers is that they do not require a heat press or any specialized heating equipment for application. They are a "cold transfer" technology, meaning the bond is created through pressure and chemical adhesion rather than heat-induced melting. This makes them accessible to hobbyists and small businesses who don't want to invest in expensive machinery. It also allows you to apply designs to heat-sensitive materials that would melt or warp in a heat press, such as certain plastics or electronic housings. All you need is a simple squeegee and your own physical strength to achieve a permanent, professional-grade result.
How Long Do UV DTF Stickers Last?
When applied correctly to a clean, non-porous surface, UV DTF stickers can last for several years. On indoor items that aren't subjected to constant friction, they can remain pristine almost indefinitely. On outdoor items or things that are handled daily, such as a laptop or a car window, you can expect a lifespan of 1 to 3 years depending on the environmental conditions. The UV-cured inks are specifically designed to resist fading from sunlight, and the varnish prevents moisture from seeping under the edges. Compared to standard vinyl stickers, which can peel or fade within months, UV DTF offers a much higher level of longevity and professional appearance.
In summary, applying UV DTF stickers is an accessible and highly effective way to customize a wide range of products with professional, durable graphics. By prioritizing meticulous surface preparation, using the right tools for even pressure, and peeling the transfer film with care, you can achieve results that rival factory-printed merchandise. Whether you are branding products for a business or personalizing gifts at home, following these steps ensures your designs stay vibrant and securely attached for years to come.