


The number of designs that can fit on a gang sheet depends on the sheet size, design dimensions, spacing between graphics, and how efficiently the artwork is arranged. A single sheet can hold many small logos, several medium-size chest prints, or only a few large back designs. Because each order has different artwork sizes, there is no fixed number that applies to every project. The most accurate way to calculate capacity is to evaluate the printable area and place each design with proper spacing for cutting and pressing.
For businesses, creators, and apparel brands, understanding how many designs fit on a DTF gang sheet helps reduce material waste and improve order efficiency. Instead of printing one design per sheet, multiple graphics can be grouped together in a structured layout. This makes gang sheets especially useful for bulk apparel production, sample runs, mixed-size orders, and designs prepared for different garment placements.
What Determines How Many Designs Fit on a DTF Gang Sheet?
Several factors determine how many designs can fit on one sheet. The most important factor is the size of each design. A small left-chest logo takes much less space than a full-back print, which means more small graphics can be placed on the same printable area. Design shape also matters because square, circular, horizontal, and vertical graphics use space differently. A compact logo may fit neatly between other artwork, while an irregular shape can leave unused gaps around it.
Spacing is another critical factor. Designs should not be placed too close together because each transfer needs enough room for cutting, handling, and accurate heat pressing. The printable width and length of the sheet also affect capacity. When using a DTF gang sheet, the goal is not only to fit as many graphics as possible but also to keep each design easy to separate and apply. A clean layout reduces production errors and helps maintain consistent print quality.
DTF Gang Sheet Size and Printable Area
The available printable area is the foundation of every gang sheet calculation. A larger sheet naturally gives more room for multiple designs, while a smaller sheet may be better for simple orders or a limited number of graphics. However, the full sheet dimension does not always equal usable print space. Margins, printer limitations, and layout requirements can slightly reduce the area where designs should be placed. This is why planning around the actual printable space is more accurate than relying only on the sheet’s listed dimensions.
Understanding DTF gang sheet size is especially important when preparing artwork for different garment placements. For example, a sheet intended for small brand logos may hold several rows of compact designs, while a sheet planned for hoodie backs or oversized t-shirt prints may fill up quickly. A practical approach is to measure each design first, group similar sizes together, and then organize them based on priority. This keeps the layout controlled and prevents last-minute adjustments during printing.
How Design Dimensions Affect Gang Sheet Capacity
Design dimensions directly control how many graphics can be added to a single sheet. Width and height both matter because a design that looks small visually may still occupy a wide horizontal area. For example, a narrow sleeve print may fit along the side of a sheet, while a wide chest graphic may take up most of one row. When artwork is planned carefully, the available space can be used more efficiently without compressing or distorting the designs.
A proper gang sheet layout should preserve the original proportions of each graphic. Designs should not be resized randomly just to fit more artwork on the sheet, because that can affect how the final transfer looks on the garment. Instead, each design should be placed according to its intended use. Small logos, medium chest graphics, and large back prints should be treated as separate layout groups. This helps maintain print accuracy while still improving the total number of usable transfers per sheet.
Small Logo and Label Designs
Small logos, neck labels, sleeve marks, and brand tags are the easiest designs to fit in larger quantities. Since they usually require limited space, they can be arranged in rows or columns with consistent gaps between each piece. These graphics are ideal for filling empty spaces around larger artwork because they can fit into narrow sections that would otherwise remain unused. For apparel brands, adding extra small logos to unused areas can improve production value and reduce waste. The key is to keep every small design readable, properly scaled, and spaced enough for clean cutting after printing.
Medium Chest and Sleeve Designs
Medium-size designs usually include left-chest graphics, center-chest prints, sleeve designs, and small front artwork. These designs take more room than labels but still allow flexible layout planning. A sheet may fit several medium designs if they are arranged with consistent spacing and aligned by size. Horizontal graphics can be placed in rows, while vertical sleeve prints may work better along the sheet edges. Since medium transfers are commonly used for t-shirts, hoodies, uniforms, and merch drops, they often form the main structure of a gang sheet. Smaller graphics can then be placed around them to use the remaining open areas.
Large Back and Oversized Designs
Large back prints and oversized designs reduce the number of graphics that can fit on one sheet because they occupy a much larger area. A full-back transfer may take up most of the printable space, leaving only small sections for logos, labels, or sleeve prints. These designs should be placed first during layout planning because they create the main space limitations. Once the large artwork is positioned, smaller transfers can be added around the edges or unused corners. This approach keeps the main design intact while still allowing the sheet to carry extra value through supporting graphics.
How Much Space Should Be Left Between DTF Designs?
Leaving enough space between designs is essential for clean cutting and easy application. If graphics are placed too close together, it becomes harder to separate each transfer without damaging the edges. Tight spacing may also create handling issues during pressing, especially when several small designs are grouped closely. A practical layout should include visible gaps around every design, giving the user enough room to trim each piece safely and prepare it for garment placement.
Spacing also helps prevent confusion during production. When designs are separated clearly, it is easier to identify which transfer belongs to which garment area. This is especially helpful for orders that include multiple placements such as chest logos, sleeve prints, neck labels, and back graphics. Proper spacing may slightly reduce the total number of designs that fit on the sheet, but it improves usability. In most cases, a clean and practical sheet is more valuable than one that is overcrowded and difficult to cut.
Sample DTF Gang Sheet Layout Scenarios
A gang sheet can be planned in different ways depending on the artwork mix. If the order includes only small logos, the sheet may be filled with repeated designs in a structured grid. If the order includes several shirt placements, the sheet may need a mixed layout with large, medium, and small graphics arranged together. The best layout depends on the final use of each design, not just the goal of filling every inch of space.
Below is a simple example of how different design types may affect capacity:
|
Design Type |
Typical Use |
Capacity Impact |
|
Small logo |
Neck label, sleeve mark, brand logo |
High capacity |
|
Medium design |
Chest print, pocket logo, sleeve transfer |
Moderate capacity |
|
Large design |
Hoodie back, oversized shirt print |
Low capacity |
These examples are not fixed rules, but they show how artwork size changes the final layout. When preparing DTF transfer designs, the most efficient approach is to combine practical sizing with clean spacing.
Fitting Multiple Small Designs on One Sheet
When a sheet is filled with small designs, the layout can usually be organized in rows, columns, or compact clusters. This is effective for brand labels, small logos, promotional graphics, product tags, or repeat artwork for apparel lines. The main advantage is quantity: smaller graphics allow more transfers to be printed on one sheet. However, each design still needs enough space around it for cutting and handling. Overcrowding can make the sheet harder to use, especially when the designs have detailed edges or similar shapes. A balanced small-design layout should be dense but still practical.
Mixing Small, Medium, and Large Transfers
A mixed layout is often the most efficient option because it uses different artwork sizes to fill the sheet more completely. Large designs should usually be placed first, followed by medium graphics, then small logos or labels in the remaining spaces. This method prevents major artwork from being squeezed into awkward positions and allows smaller designs to fill gaps naturally. For example, a large back print may sit in the center, while sleeve prints and chest logos are placed along the sides. This type of planning works well for apparel orders that include complete branding sets for multiple garment placements.
Common Mistakes That Reduce Gang Sheet Efficiency
One common mistake is resizing designs without considering their final placement on the garment. A logo may fit better on the sheet when reduced, but it may become too small for its intended use. Another mistake is leaving large empty gaps between graphics. While spacing is necessary, inconsistent or excessive spacing can waste printable area and reduce the number of transfers that fit on the sheet. A strong layout should balance usable spacing with efficient placement.
Another issue is placing designs randomly instead of grouping them by size and function. Random placement often creates awkward gaps and makes the sheet harder to cut. Designs with similar widths, heights, or garment placements should be organized together when possible. It is also important to avoid placing artwork too close to the sheet edge, as this may affect handling or trimming. A well-planned sheet should look structured, easy to understand, and practical for real production use.
How to Arrange Designs for Better DTF Gang Sheet Usage?
The best way to arrange a gang sheet is to begin with the largest designs first. Large artwork creates the biggest space restrictions, so placing it early helps define the rest of the layout. After that, medium designs can be arranged around the main artwork, followed by small logos, labels, or sleeve prints in the remaining open spaces. This process keeps the sheet organized and prevents smaller elements from blocking better placement options for larger transfers.
Alignment also matters. Designs should be placed in a way that makes cutting and application simple. Keeping similar designs in rows or sections can reduce confusion and save time during production. It is also useful to leave enough space between each graphic so the transfers can be separated cleanly. For repeat orders, saving a successful layout structure can make future ordering faster. A consistent system helps maintain quality and gives each sheet a more professional production flow.
When Should You Choose a Larger DTF Gang Sheet?
A larger sheet is useful when the order includes multiple designs, several garment placements, or large artwork that cannot fit comfortably on a smaller sheet. If you are trying to include back prints, chest graphics, sleeve transfers, and neck labels together, a larger sheet gives more flexibility. It can also reduce the need for multiple smaller sheets, which may make the order easier to manage and organize. The decision should be based on total artwork size, not only the number of designs.
Choosing a larger sheet can also help when spacing becomes too tight. If designs are packed too closely, the sheet may become difficult to cut and apply. In that case, increasing the sheet size can improve usability without forcing artwork to be resized. A larger sheet is especially valuable for apparel brands, print shops, event merchandise, team uniforms, and custom product drops where several designs need to be prepared at once. Better sheet selection supports cleaner production and fewer layout compromises.
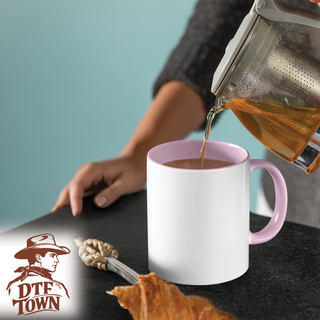
How DTF Town Helps You Maximize Your Gang Sheet Layout
DTF Town helps users make better use of their sheet space by supporting practical layout planning for different artwork needs. Whether the order includes small logos, chest prints, sleeve designs, or large back transfers, the goal is to keep the sheet efficient without making it difficult to cut or apply. A good layout should not only fit multiple designs but also preserve design quality, spacing, and usability during the final production stage.
For customers who are preparing custom apparel, DTF Town’s workflow makes it easier to think through sizing, placement, and artwork organization before ordering. This is especially useful when a project includes several design types on one sheet. Instead of treating every graphic separately, users can plan the full sheet as a complete production asset. That approach helps reduce waste, improve order value, and create a smoother transfer application process for shirts, hoodies, uniforms, and branded merchandise.
Final Checklist Before Ordering a DTF Gang Sheet
Before placing an order, every design should be checked for size, spacing, resolution, and placement purpose. The artwork should be scaled according to the garment area where it will be applied, not simply adjusted to fit more pieces on the sheet. It is also important to confirm that there is enough space between each design for trimming. A crowded sheet may look efficient at first, but it can create extra work during cutting and pressing.
A final review should also include the overall layout structure. Large designs should be placed logically, medium transfers should be aligned cleanly, and smaller graphics should be used to fill open spaces where appropriate. Checking the sheet before submission helps avoid production delays and layout errors. When the printable area, artwork dimensions, and spacing are reviewed together, the final gang sheet becomes easier to use and more cost-effective for apparel production.