


For small apparel businesses, efficiency and material optimization are critical to maintaining profitability. One of the most practical tools that helps achieve this in DTF printing is the gang sheet. Instead of printing one design at a time, multiple graphics can be arranged on a single sheet and transferred across different garments. This approach reduces waste, speeds up production, and improves cost control.
However, many small shops struggle with selecting the right gang sheet size. Choosing a sheet that is too small can limit design capacity and increase the number of prints required, while selecting a sheet that is too large may create unnecessary waste or handling difficulty. Understanding gang sheet sizing is therefore not just a technical detail but a key operational decision.
This guide explains how gang sheets work, which sizes are commonly used, and how small print shops can consistently choose the most efficient sheet size. By applying practical layout strategies and avoiding common mistakes, small businesses can improve printing efficiency and reduce overall production costs.
What Is a DTF Gang Sheet and Why Size Matters
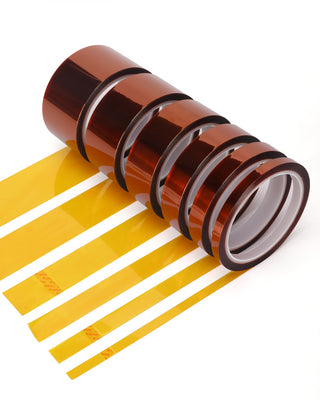
A DTF gang sheet is a print layout where multiple designs are placed together on a single film sheet before the transfer process. Instead of printing individual transfers one by one, printers combine multiple graphics into one sheet to maximize available space. This method helps streamline production workflows and significantly reduces film usage and print time.
For small shops, the size of the gang sheet directly influences both productivity and cost control. A well-chosen sheet size allows multiple designs to be printed in a single run, minimizing printer idle time and reducing material waste. On the other hand, poorly sized sheets may create unused areas, forcing operators to run additional prints and increasing operational costs.
Another important factor is workflow efficiency. Larger gang sheets allow more designs per print but may require better layout planning and cutting precision. Smaller sheets are easier to manage but may reduce throughput when dealing with larger orders. Selecting the right size therefore balances order volume, design dimensions, and production capacity.
How Gang Sheets Improve Print Efficiency
Gang sheets improve printing efficiency by allowing multiple designs to be printed simultaneously on a single transfer film. This approach eliminates the need to run separate prints for each individual design, which can significantly slow down production in busy print shops. By grouping multiple graphics together, printers can complete larger batches in fewer print cycles.
For small shops that handle mixed orders or custom apparel requests, gang sheets provide operational flexibility. A single sheet can include logos, chest prints, sleeve graphics, and back designs for several garments. Instead of printing each component individually, all required transfers are produced in one coordinated layout.
This efficiency also reduces machine wear and setup time. Fewer print runs mean less frequent printer preparation, fewer film changes, and reduced ink calibration adjustments. As a result, operators can focus more on production quality and less on repetitive preparation tasks. Over time, this efficiency directly translates into faster turnaround times and improved production capacity.
The Impact of Sheet Size on Production Cost
The size of a DTF gang sheet plays a direct role in determining production cost. Every transfer sheet uses film material, ink, and processing time, so maximizing the number of designs per sheet helps reduce the cost per print. When the sheet size is optimized, the printer can utilize nearly the entire surface area for designs, minimizing unused space.
If a shop frequently prints designs that occupy only a portion of a large sheet, the remaining space becomes wasted material. This waste increases film consumption and raises production costs. Conversely, using a sheet that is too small may require multiple print runs for the same batch of orders, which increases labor and machine usage.
Small print shops benefit from carefully matching sheet size with typical order types. Shops that produce many small logos or chest prints may benefit from medium-sized sheets, while shops handling large back prints may need larger sheets to maintain layout efficiency. Choosing the correct sheet size ultimately helps balance material cost, machine efficiency, and production speed.
Most Common DTF Gang Sheet Sizes Used by Small Shops
DTF gang sheets are produced in several standard sizes, and each size serves different production needs. Small shops typically select sheet sizes based on printer width, order volume, and the average size of the designs they print. Understanding these common sheet formats helps shop owners plan production more effectively.
Many DTF printers operate with a 22-inch film width, which is why most gang sheet formats follow this width standard. The length of the sheet then determines how many designs can be placed in a single print run. By adjusting the sheet length, shops can control the number of designs printed at once without changing printer settings.
For small shops handling diverse orders, three sheet sizes are particularly common. These formats provide a balance between usability, material efficiency, and manageable cutting processes. Choosing between them usually depends on order size, workflow speed, and available workspace for cutting and sorting transfers.
22x24 Inch Sheets
The 22x24 inch gang sheet is one of the most practical options for small print shops handling low-volume or mixed orders. Its compact size makes it easy to manage, cut, and organize during production. Shops that produce small batches of custom apparel often prefer this format because it allows quick turnaround without committing to a large sheet layout.
This sheet size is especially useful for printing chest logos, sleeve graphics, or small brand marks. Several small designs can be arranged efficiently across the sheet without requiring complex layout planning. Because the sheet is relatively short, operators can also cut and separate transfers quickly after printing.
However, the smaller format means fewer designs can be printed in a single run. For larger orders, multiple sheets may be required, which can increase production time. As a result, this size works best for small businesses focused on custom orders, limited runs, or personalized apparel projects.
22x60 Inch Sheets
The 22x60 inch gang sheet offers a balanced solution between small-batch flexibility and higher production efficiency. It provides significantly more printing space than shorter sheets while still remaining manageable for layout planning and cutting. Many small shops consider this size a practical standard for daily production.
With the additional length, printers can include multiple garment designs on a single sheet. For example, a single sheet may contain several chest prints, sleeve logos, and full-size back graphics. This flexibility allows shops to consolidate multiple customer orders into one efficient print run.
Another advantage of this size is cost optimization. Because more designs can be placed on the sheet, the material cost per design decreases. Shops that frequently process medium-sized orders often benefit the most from this format, as it reduces the number of print runs required while maintaining manageable sheet handling.
22x120 Inch Sheets
The 22x120 inch gang sheet is designed for larger production runs and high-volume orders. Its extended length allows printers to arrange a large number of designs within a single layout, making it ideal for shops that regularly handle bulk garment printing. When used efficiently, this size can significantly improve production speed.
This sheet format is particularly effective when printing identical designs across many garments. By filling the entire sheet with repeated graphics, shops can produce dozens of transfers in one run. This reduces machine setup time and minimizes interruptions in the printing process.
However, larger sheets require careful layout planning and adequate workspace for cutting and sorting transfers. Without a clear workflow, large sheets can become difficult to manage during the finishing stage. Small shops considering this size should ensure they have enough workspace and an organized cutting process to maintain efficiency.
How to Choose the Right Gang Sheet Size for Your Orders
Selecting the right gang sheet size requires understanding the types of orders a shop typically processes. Different businesses handle different print volumes, garment styles, and design dimensions. The most effective sheet size is therefore the one that aligns with the shop’s typical production pattern.
Small shops often deal with a combination of custom requests, small brand orders, and occasional bulk printing. In such environments, flexibility becomes essential. Choosing a sheet size that supports both small and medium-sized orders allows the shop to maintain efficient production without constantly adjusting workflow processes.
Another factor is printer capability. The width of the printer determines the maximum sheet width, while the length determines how many designs can be included in a single layout. Shops should evaluate their most common order types and select a sheet size that accommodates those designs with minimal unused space.
Order Volume and Design Quantity
Order volume is one of the most important factors when selecting a gang sheet size. Shops that regularly handle small batches of custom orders may benefit from smaller sheets, which allow faster printing and easier layout preparation. These sheets help maintain flexibility when dealing with varied design requests.
On the other hand, shops producing larger apparel runs often prefer longer gang sheets. A larger sheet allows multiple copies of the same design to be printed simultaneously, reducing the total number of print runs required to complete an order. This approach improves production speed and lowers labor costs.
Design quantity also plays a role in layout efficiency. If a single order includes many different graphics, larger sheets provide the flexibility to combine them in one layout. By grouping designs intelligently, small shops can maximize printing efficiency while minimizing wasted film space.
Garment Types and Print Dimensions
Different garments require different print sizes, which directly affects gang sheet planning. For example, chest logos typically occupy smaller areas, while back prints and hoodie graphics require significantly larger transfer spaces. Understanding these size differences helps determine how many designs can fit on a single sheet.
Small shops printing primarily t-shirts with front logos may find that medium sheets provide sufficient space for multiple designs. However, shops printing oversized graphics or hoodie designs may need larger sheets to accommodate the required print dimensions without overcrowding the layout.
Proper planning ensures that designs are arranged with enough spacing for cutting and heat transfer alignment. By considering garment types during layout preparation, shops can prevent overcrowded sheets and maintain consistent transfer quality across different apparel products.
Layout Strategies to Maximize Space on a Gang Sheet
Efficient layout planning is essential for making the most of a gang sheet. Even with the correct sheet size, poor layout organization can result in wasted space and increased production costs. Strategic placement of designs ensures that the sheet is used effectively and that each print run delivers maximum output.
Small shops often handle designs of different sizes, which makes layout planning slightly more complex. Instead of placing graphics randomly, operators should arrange them in a way that fills the sheet as completely as possible while maintaining safe cutting margins. This approach minimizes unused areas and improves material efficiency.
Modern design software makes it easier to preview layouts before printing. By experimenting with different placements and orientations, printers can identify the most efficient arrangement before sending the file to the printer. Over time, consistent layout planning becomes a key factor in reducing film waste.
Design Spacing and Cutting Margins
Proper spacing between designs is critical for successful gang sheet production. Transfers that are placed too close together can become difficult to cut accurately, increasing the risk of damaging adjacent designs during separation. Maintaining consistent margins helps prevent this issue.
Most printers leave a small gap between designs to create a safe cutting area. This spacing ensures that each transfer can be trimmed cleanly without affecting neighboring graphics. It also helps operators work more quickly during the finishing stage, as the designs remain clearly separated.
In addition to spacing between designs, printers should maintain margins along the sheet edges. These margins help stabilize the film during printing and ensure that designs remain properly aligned during the transfer process. Consistent spacing ultimately supports both efficiency and transfer accuracy.
Using Design Nesting to Reduce Empty Areas
Design nesting is a layout technique used to reduce empty spaces on a gang sheet. Instead of placing designs in rigid rows, operators position smaller graphics in the gaps between larger ones. This strategy helps maximize the usable area of the sheet.
For example, a large back print may leave unused space around its edges. By placing small logos or sleeve graphics in those areas, printers can increase the number of designs printed on a single sheet. Over time, this method can significantly reduce film waste.
Nesting requires careful planning but becomes easier with experience and layout software tools. Many modern design applications include automatic nesting features that help identify optimal placement patterns. When used correctly, nesting can dramatically improve the efficiency of gang sheet production.
Common Mistakes Small Shops Make When Choosing Sheet Sizes
Many small print shops encounter challenges when selecting gang sheet sizes, particularly during the early stages of their production workflow. One common mistake is choosing sheet sizes without analyzing typical order patterns. Shops may purchase large sheets assuming they will increase efficiency, only to discover that their orders rarely fill the available space.
Another frequent issue is ignoring design dimensions during sheet selection. If a shop regularly prints large graphics but uses smaller sheets, the designs may not fit efficiently. This mismatch can lead to multiple print runs for a single order, increasing production time and material usage.
Some shops also overlook the operational impact of handling large sheets. While longer sheets allow more designs per print, they can become difficult to manage during cutting and sorting. Without a well-organized workspace and clear workflow, oversized sheets may slow down the finishing stage instead of improving efficiency.
Tips to Reduce Material Waste and Printing Costs
Reducing material waste is essential for maintaining profitability in DTF printing. Film, ink, and powder all contribute to production costs, so efficient sheet usage directly affects the bottom line. Small shops that optimize their gang sheet layouts often see noticeable savings in both materials and labor.
One practical strategy is grouping similar orders together. By combining multiple customer requests into a single gang sheet, printers can fill empty areas that might otherwise go unused. This approach allows shops to maximize sheet usage without increasing production complexity.
Another effective practice is reviewing layouts before printing. Taking a few extra minutes to optimize design placement can prevent wasted space across the sheet. Over time, consistent layout planning helps shops reduce film consumption while maintaining high production efficiency.
When to Use Custom Gang Sheet Sizes Instead of Standard Sheets
While standard sheet sizes work well for many production scenarios, some shops benefit from using custom gang sheet lengths. Custom sheets allow printers to match the sheet size precisely to the number of designs required for a specific order. This flexibility helps reduce unused film areas.
For example, a shop producing a medium-sized batch may find that a 60-inch sheet is slightly too large, leaving empty space at the end of the layout. In this case, a custom sheet length tailored to the design arrangement can provide better material efficiency.
Custom sheets are particularly useful for businesses that handle consistent order quantities. When the same design quantities are printed repeatedly, adjusting sheet length can reduce waste and simplify layout preparation. This strategy helps small shops maintain efficient production while adapting to their specific order patterns.
Practical Workflow for Small Shops to Select the Correct Sheet Size
Developing a consistent workflow for selecting gang sheet sizes helps small shops maintain efficiency across different orders. Instead of choosing sheet sizes randomly, printers can follow a structured process that evaluates order details, design dimensions, and layout capacity before printing begins.
The first step is reviewing the number of designs required for the order. By estimating how much space each graphic will occupy, printers can determine the minimum sheet length needed to accommodate all transfers. This calculation prevents unnecessary sheet waste.
The next step is testing the layout using design software. By arranging graphics digitally before printing, operators can confirm whether the chosen sheet size provides sufficient space. If large gaps remain, the layout can be adjusted or the sheet size modified. Following this workflow ensures consistent sheet selection and more efficient DTF production.